Mini Cheesecake Recipe (video)

These mini cheesecakes are bursting with rich, tangy flavors that will leave you craving more. Whether you’re hosting a party, surprising someone special, or simply treating yourself, these irresistible delights are the perfect way to impress and indulge.
Why you’ll love this recipe:
- Simple and quick to make – With minimal prep time and a quick baking process, you can whip up a batch of these delightful treats without spending hours in the kitchen. Plus, they store well, making them a convenient make-ahead dessert.
- Perfect individual portions – These mini cheesecakes are a perfect single-serving for parties or for enjoying a guilt-free treat. Each bite has the perfect balance of creamy filling and crunchy crust, ensuring that everyone gets the perfect taste without overindulging.
- Endless variations – Whether you prefer whipped cream and fresh berries, chocolate sauce, or lemon curd, these mini cheesecakes can be easily customized to suit any taste preference. Mix and match toppings to create a variety of flavors that will delight every guest.
Ingredients you’ll need and why:
- Honey graham cracker crumbs – Form the base of the cheesecake crust, providing a nutty flavor and subtle sweetness, and their sandy texture makes the crust tender.
- Melted butter – Binds the graham cracker crumbs together and also adds a buttery richness to the crust.
- Cream cheese – The star of the cheesecake filling, giving it its signature smooth and creamy texture along with a tangy flavor that balances the sweetness.
- Granulated sugar – Sweetens the cheesecake filling, enhancing the flavors of the cream cheese and other ingredients while providing the necessary sweetness.
- Vanilla extract – Adds a warm, aromatic flavor to the cheesecake filling, enhancing its overall taste and depth.
- Eggs – Act as a binding agent in the cheesecake filling, helping to set and thicken the mixture as it bakes, resulting in a firm yet creamy texture.
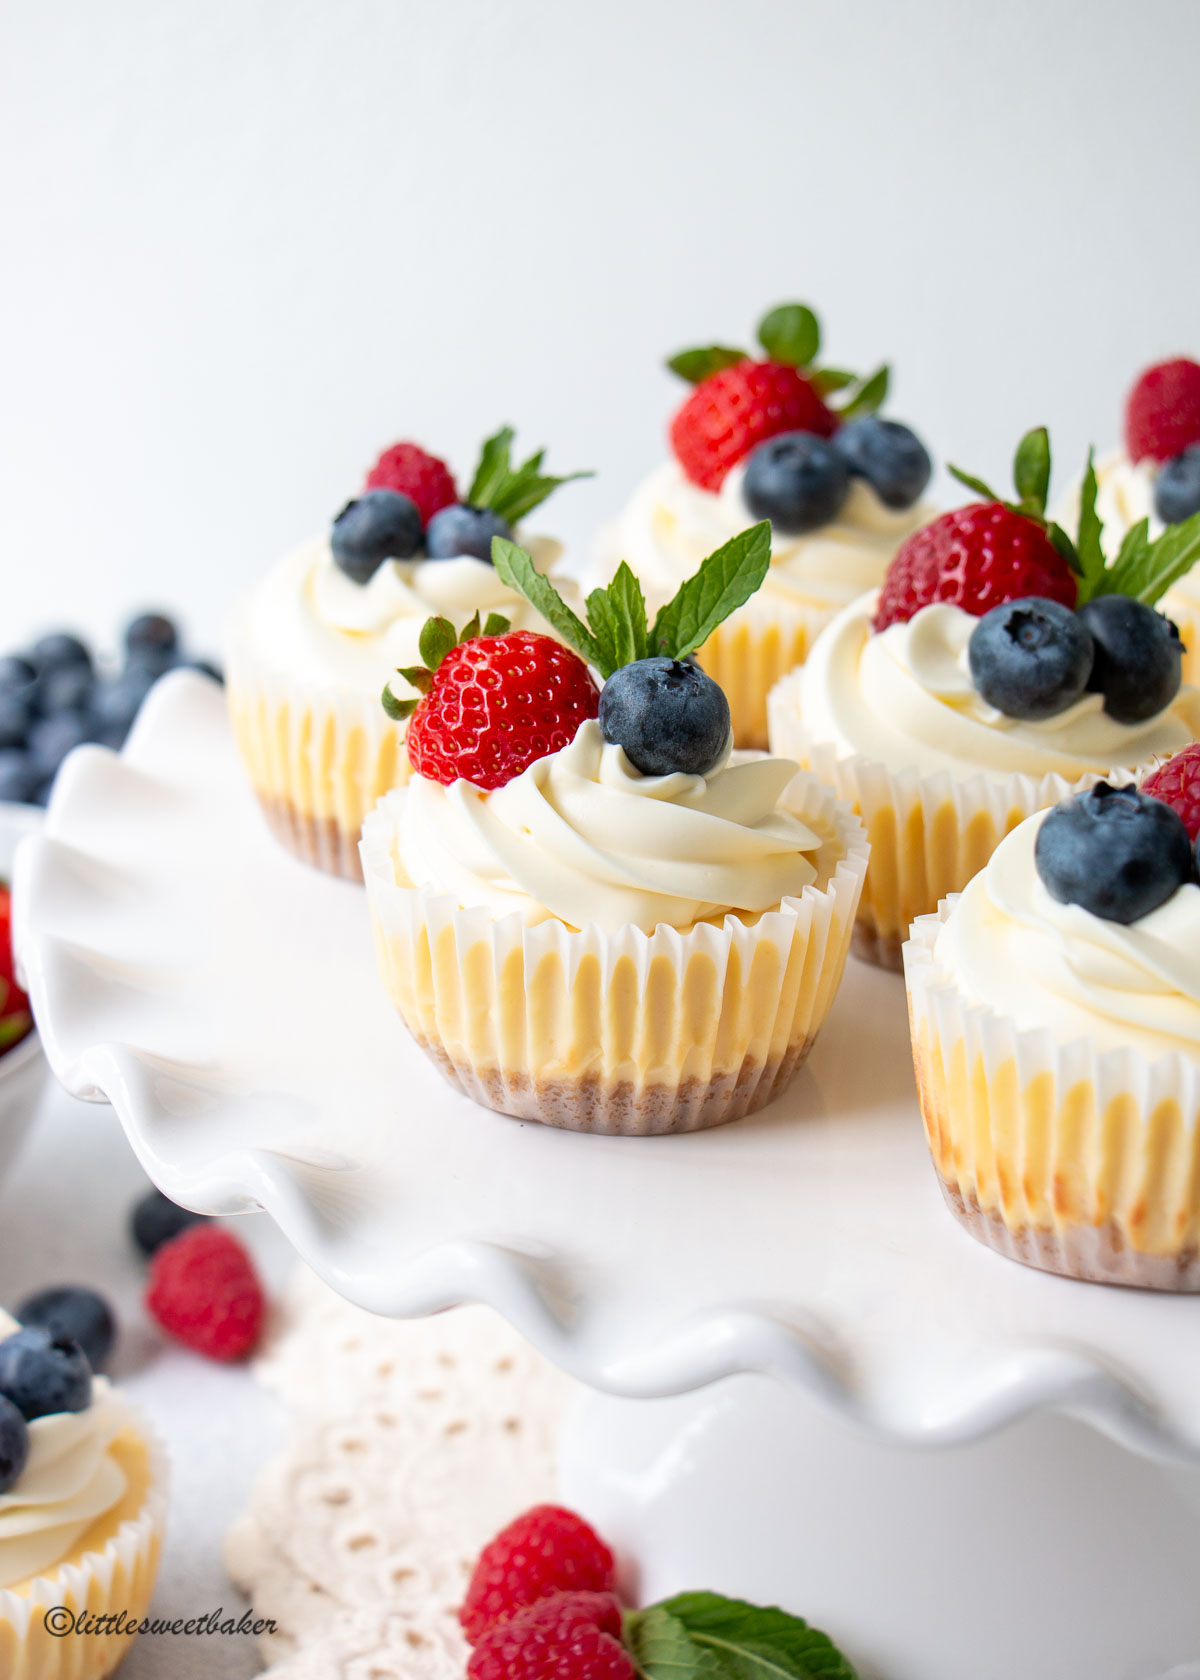
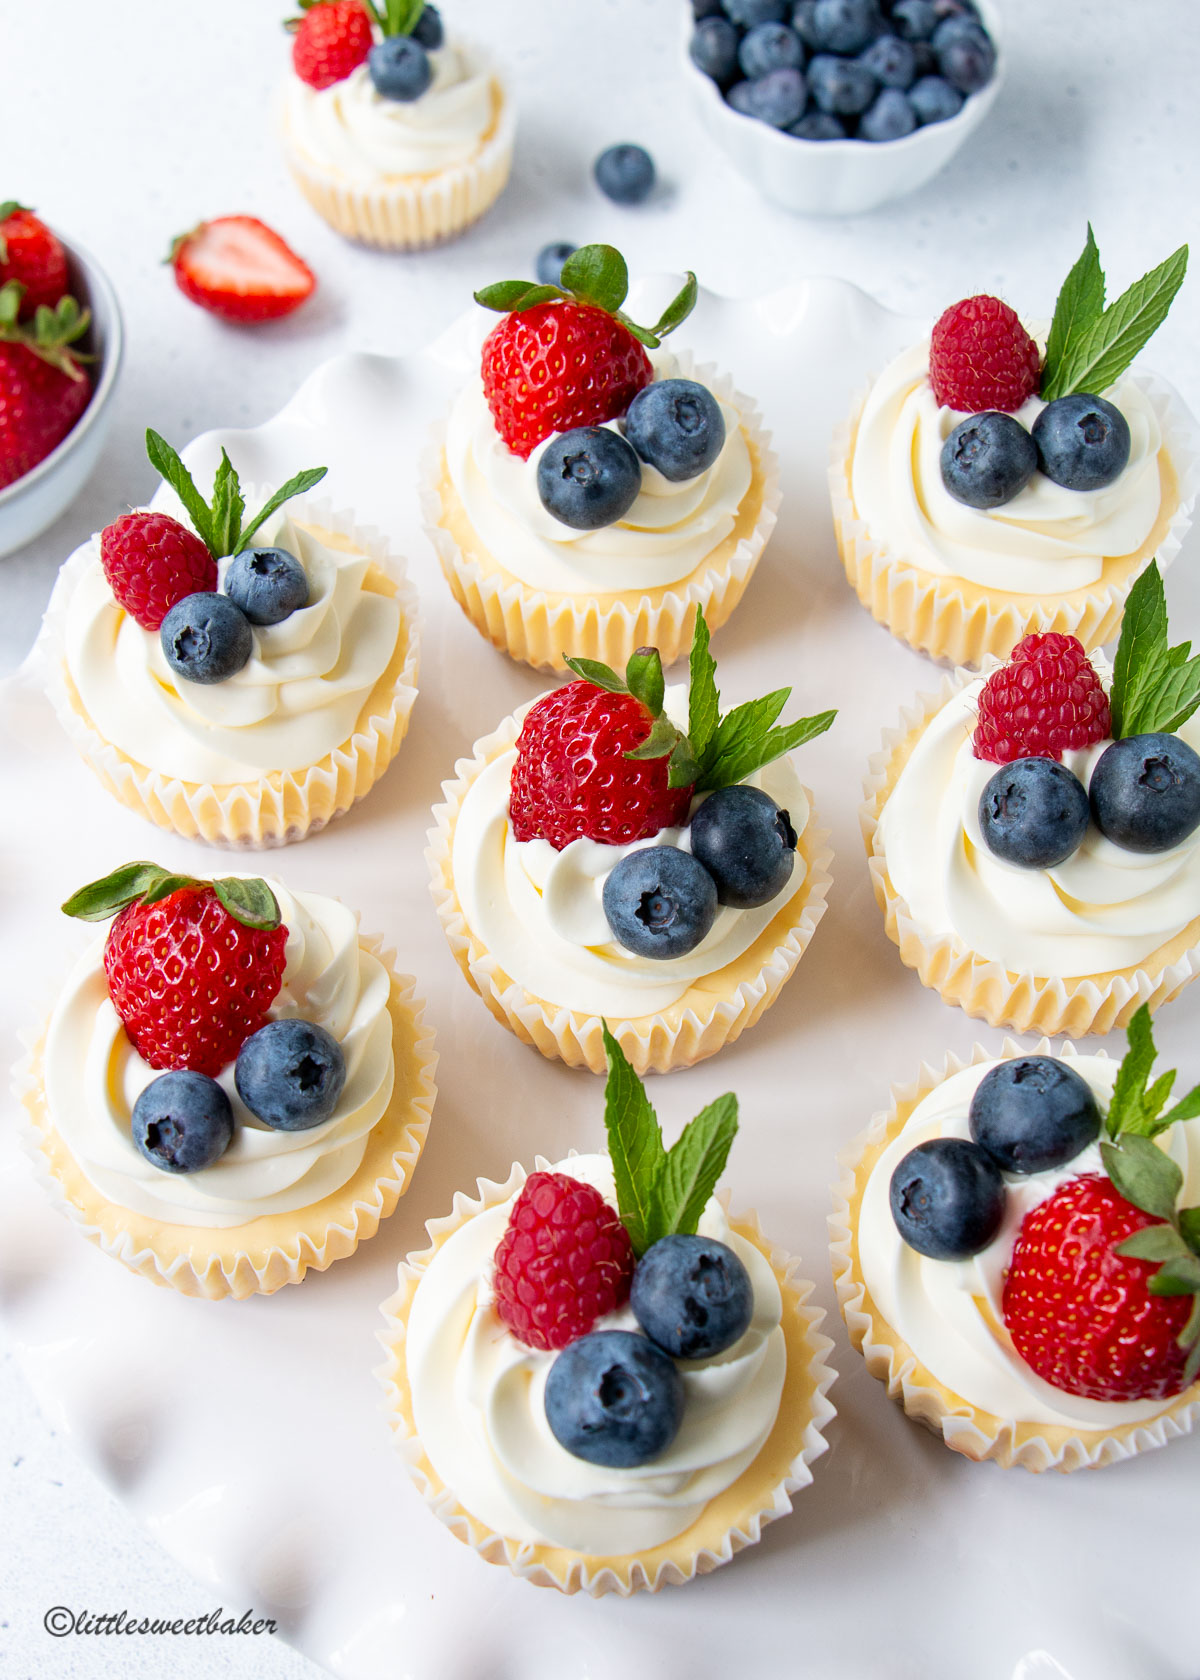
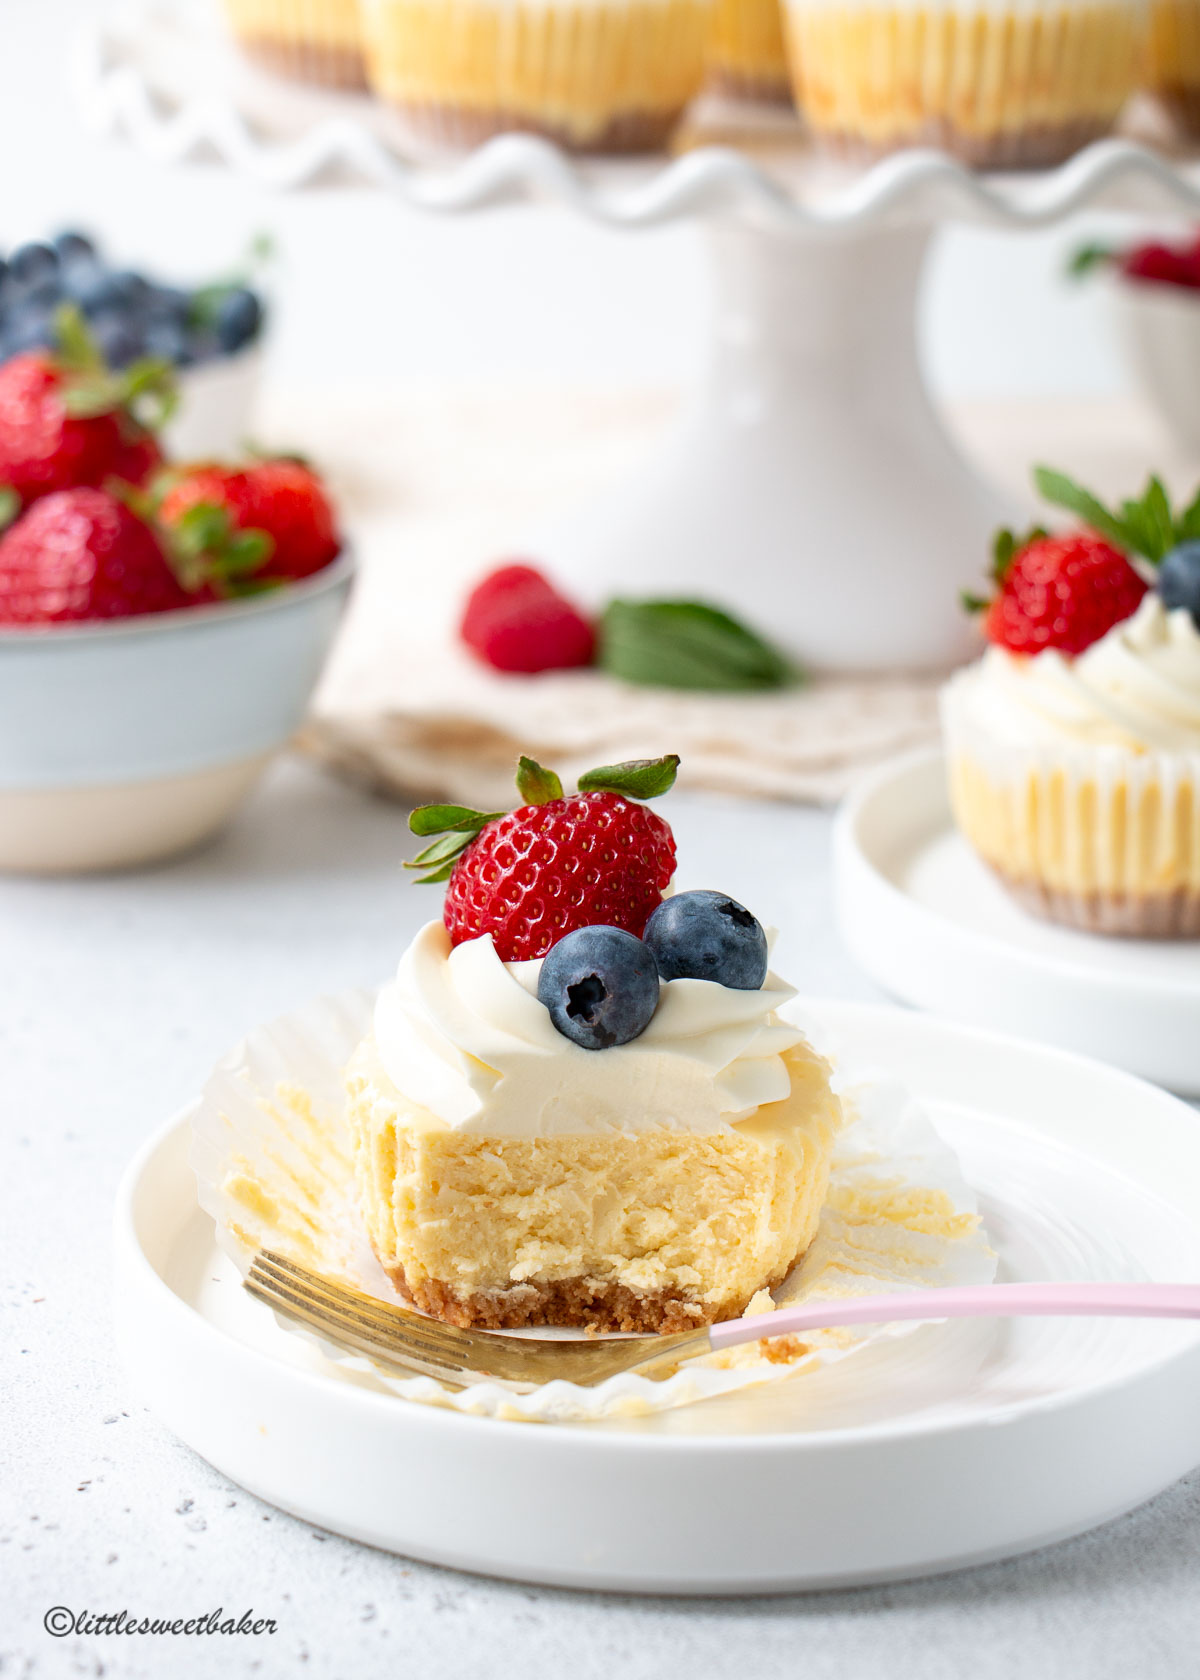
- Whipped Cream (optional) – Adds a light, airy texture that complements the dense creaminess of the cheesecake. It also provides a beautiful decorative finish.
- Fresh Berries (optional) – Gives a burst of color and a refreshing contrast to the rich, creamy cheesecake. They add a natural sweetness and slight tartness, enhancing the overall flavor profile of the dessert.
How to make mini cheesecakes:
(The full written and printable recipe is further below.)
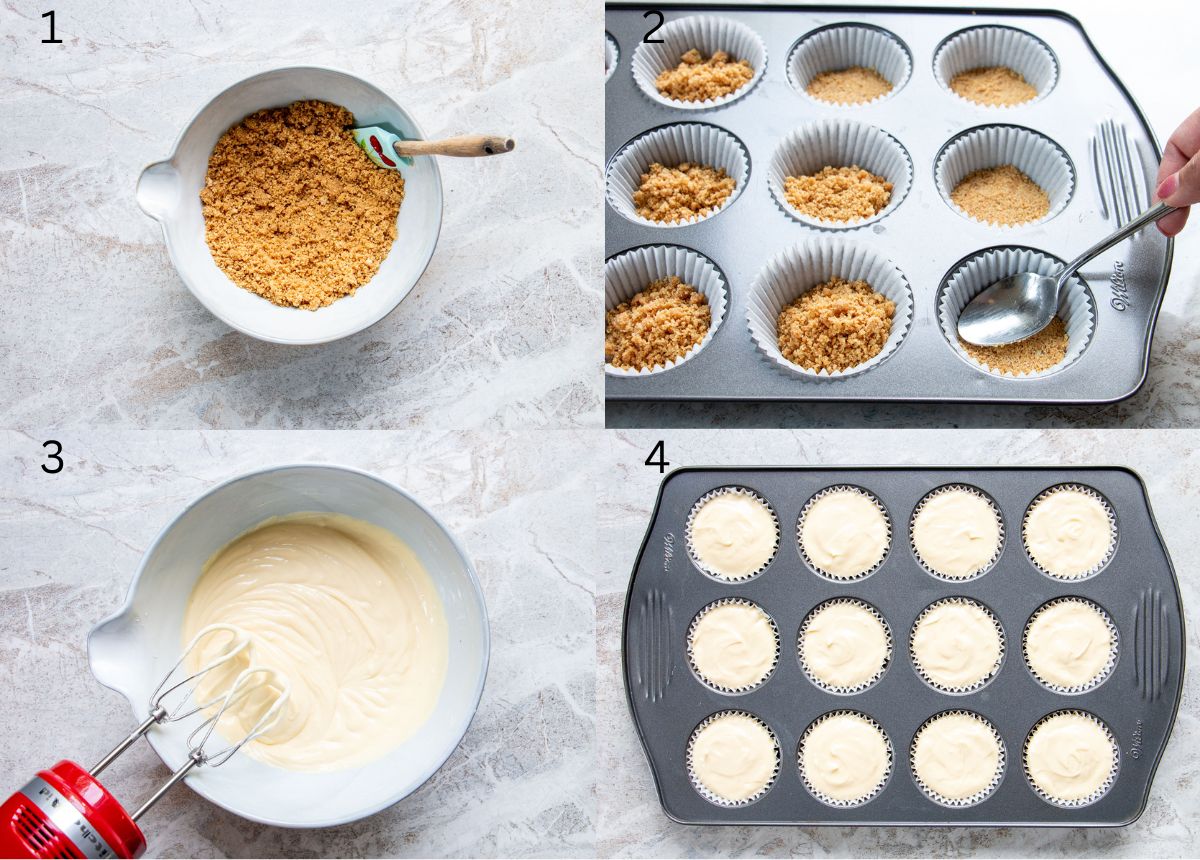
- In a small bowl, stir together the graham cracker crumbs and butter.
- Divide the mixture into a muffin pan lined with paper liners. Pat the mixture down with the back of a spoon and set aside.
- In a medium bowl, beat together the cream cheese and sugar. Add in the vanilla and mix again. Then add in the eggs, one at a time, and beat until smooth.
- Divide the batter evenly into the paper liners. Bake at 325F for about 20 minutes or until the center is almost set.
Expert tips:
- Room temperature ingredients – Make sure your cream cheese and eggs are at room temperature to ensure a smooth and creamy filling.
- Don’t overbake – Keep an eye on the cheesecakes while they bake. They should be set but still slightly jiggly in the center when you remove them from the oven.
- Chill thoroughly – For the best texture and flavor, let the mini cheesecakes chill in the refrigerator for at least an hour or overnight before serving. This allows the flavors to meld and the texture to set properly.
Variations:
- Crust – You can use any kind of cookie crumbs, like Oreos, gingersnaps or vanilla wafers.
- Flavoring – Feel free to add some lemon zest or almond extract or even a splash of liquor for extra flavor.
- Toppings – Instead of whipped cream and berries, here are some other ideas:
- chocolate ganache
- lemon curd
- caramel sauce
- jam or fruit preserves
- cooked pie filling
- any kind of fresh fruit
FAQ:
The mini cheesecakes are done when the edges are set and the centers are slightly jiggly. They will continue to set as they cool.
Absolutely! Once they are fully chilled, you can freeze mini cheesecakes by placing them in an airtight container. Thaw them in the refrigerator for a few hours before serving.
Yes, mini cheesecakes are perfect for making ahead. You can prepare them up to 2 days in advance and store them in the refrigerator, or freeze them for longer storage. Just add toppings right before serving to keep them fresh.
You might also like:
Did you make this recipe? Please kindly leave a comment with your star rating below.
Mini Cheesecakes Recipe
Ingredients
- 1 cup (110g) honey graham cracker crumbs
- 3 Tbsp melted butter
- 16 oz (2pkg./250g each) cream cheese, softened
- 1/2 cup (100g) granulated sugar
- 1 tsp vanilla extract
- 2 large eggs
Instructions
- Preheat oven to 325F and line a 12 cup muffin pan with paper liners.
- In a small bowl, stir together the graham cracker crumbs and butter.1 cup (110g) honey graham cracker crumbs, 3 Tbsp melted butter
- Divide the crumb mixture amongst the paper liners (about 2 tsp each). Pat down with back of a spoon. Set aside.
- In a medium bowl, beat together the cream cheese and sugar.16 oz (2pkg./250g each) cream cheese, 1/2 cup (100g) granulated sugar
- Add in the vanilla and mix again. Then add in the eggs, one at a time, and beat until smooth.1 tsp vanilla extract, 2 large eggs
- Divide the batter evenly into the paper liners and bake for about 20 minutes or until dull on the surface and center is almost set.
- Let cool completely and refrigerate uncovered for a minimum of 1 hour before serving. Top as desired or enjoy as is.


Are you going to have a recipe for Mexican dot cake which has gone viral.
Thanks for this recipe! It is an absolute hit. Can I use this recipe with a mini muffin pan?
Sure that would be cute. Little bite-size cheesecakes. Just adjust the bake time accordingly.
Hi this is my go to recipe and has shared it with friends.
I hope you can also make a biscoff mini cheesecake too in your recipes.
Thanks.
Thanks Rachel and added to the list!
Could you freeze them?
Yes, they freeze well. Enjoy!
this is my go to recipe for those last minute get togethers. I have read that when making cheesecake, my ingredients should be at room temperature. What are your thoughts.
Hi Lee,
The cream cheese should definitely be at room temperature or else it will be too hard to mix. As for the other refrigerated ingredients, it really doesn’t make that much of a difference whether they are at room temp or not. My eggs and other dairy products (if the recipe calls for it) are usually cold and I’ve never had an issue. I hope that helps and thank you for your kind words!
Hi there. Thank you so much for the Mini Cheesecake recipe. I will be trying these for my Birthday on the 15 July. It is a wonderful treat for my whole family. I also love the fact that I can freeze them should there be left-over for another treat day.
Thank you again Lily.
You’re very welcome, Lucille! Enjoy the mini cheesecakes and happy birthday next month!
Hi Lily, I had tried this mini cheesecake and it taste awsome. Thank you so much for the recipe. Can I double up the recipe to bake for a 9″ springform pan and how long do I need to bake for? Thank You.
Yes, you can double this recipe and bake for about 60-80 minutes or until done. You can also use this recipe guide for a 9″ cheesecake: https://www.littlesweetbaker.com/how-to-make-a-cheesecake/
Hi Lily, thank you so much for your reply. Really love your recipes, all turns out good and easy to follow with your videos and steps. Have a great weekends!!
Theses mini cheese cakes are delicious.So easy to make though I did cook longer than 20 min. came out perfect.Ill have to give them away we can t eat them all though we’d like too.Love all your recipes I’ve made.Thanks
You’re very welcome, Linda! Thank you for your kind words. P.S These mini cheesecakes freeze well, so you can stash the extras and thaw them out when you feel like cheesecake again!
These mini cheesecakes are absolutely adorable! I made them earlier and my husband could not stop eating them that I had to take them away from him! Thank you for sharing this lovely recipe!
Lol, that sounds like my husband! You’re very welcome and have a great day!
this recipe looks good and easy! 🙂 can you please advise on how you topped them in the video – it looks like you used some heavy whipping cream but I wasn’t sure. thank you!
Yes, I topped them with some whipped cream and fresh berries. Enjoy and have a lovely day:)
I made these for me and my family and we LOVE them! They are perfect for parties and family gatherings. Thank you little sweet baker for such an amazing recipe!
You’re very welcome Andrew and thank you for your kind words. Enjoy and have a lovely weekend:)
These cheesecakes are so cute my heart just skipped a beat!!!!
Mmm these mini cheesecakes look so good, Lily. I love the berries on top for decoration!